Example Of Layers In GIMP
In the previous lesson, we saw a basic example of how layers work. In this lesson, we will look at how layers can work using a slightly more complex image.
Actually, this is still quite a simple image. However, it contains more elements that can be separated. Therefore, we can create more layers in order to give us more flexibility.
Example Image
Let's look at the following image:
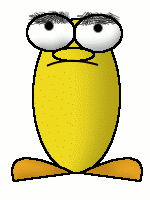
I created this little character using 12 layers. It could have been made with as little as one layer, but I found that 12 layers gives me much more control and flexibility.
Breakdown Of Layers
You may be thinking "12 layers! How do you get 12 layers from a simple image like that?"
Well, the following screenshot should give you some idea of what elements are separated into different layers.
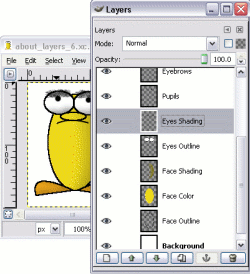
You can see that virtually every element has been allocated its own layer. Even the eyes take up four layers; one for the outline, one for the pupils, one for the eyebrows, and one for the shading.
You might think that this is a bit of overkill. After all, eyes are eyes aren't they? They won't be changing anytime soon?
Well, think again!
Modifying Our Image - Reaping The Benefit Of Layers!
Lets say I decide that I don't like the shading on this little character. No problem, I can simply hide the layers that provide the shading.
And, let's say our little character sees something to his left. What is he going to do?
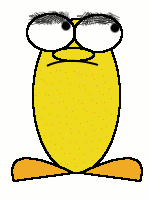
It took me less than a minute to make those modifications and export it to a GIF. I simply hid the layers for the shading, then moved the layer with the pupils a little to the right. Once I was done, I could move it back.
Now if our little character sees something to his right, we'll know what to do!
Now that we've looked at how layers work, let's create one.